MeeBlipをケースに入れるCreating Panel for MeeBlip
MeeBlipはAVRを使ったデジタルシンセサイザーです。
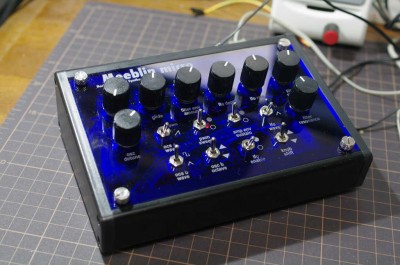
MeeBlip Microキットを購入し、使い易いように、ケースに入れてみました。
MeeBlip is a digital synthesizer which make use of AVR.
I obtain a MeeBlip Micro kit, hacked it, and make a case for it.
1. MeeBlipとは?
MeeBlipはAVRを使ったデジタルシンセサイザーです。以下のページに関連する情報があります。
- プロジェクトページ(meeblip.com)
- コミュニティ
- ソースコード
githubでソースコードや設計情報などが公開されています。OSHWですので改造なども自由にできます。
また、Reflex Audio Systems社からリーズナブルな価格でキットも販売されています。キットを購入すれば、自分で部品を集めなくても済みます。
今回は、基板のパーツがセットになっているMeeBlip microキットを購入しました。日本からの注文した場合、カナダから航空便で約2週間かかりました。
2. MeeBlip microキットの改造
MeeBlipのキットは数種類あります。音をだす信号処理のエンジンは同じですが、少し構成や機能が変わります。
MeeBlip microは$39.99と最も安価なキットです。キットには基板と基板上に取り付けるパーツが付属しますが、別にケースやスイッチなどを集めて組み立てる必要があります。手間はかかりますが、世界で一台のオリジナル設計のシンセサイザーを作ることができます。
他のモデルの場合、シンセサイザーのパラメータを操作するためパネルにボリュームが8個とスイッチが16個付きます。microの場合にはパラメータは全てMIDI経由で制御することができるため、パネルに全くスイッチやノブのないシンセサイザーとすることもできます。最低限必要な端子は、電源とMIDI入力、信号出力用端子のみです。
今回は次の構成とすることにしました。
- 全部ソフト制御では味気ないため、microの基本機能を使うためのボリューム、スイッチを付ける(各8個)
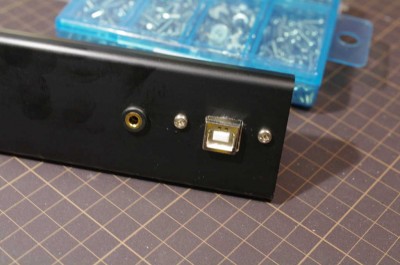
- シリアルMIDIは取り付けずに、Moco基板を使って、直接USB-MIDIからならせるようにする。
- 電源もUSB-MIDI経由でホストから供給する。
3. パネルの設計
ケースを作成するのは手間がかかるため、今回は市販のケースを使うことにしました。操作し易い斜めのコントロールボックス型のケースをTAKACHIの商品からCF型傾斜コントロールボックスを選択しました。
パネルの加工は手間がかかるし、文字入れなども必要になるため、レーザ加工のアクリルを使ってみることにしました。ちょうど、Emergeplusさんで加工賃半額セールを実施していたので、利用させてもらいました。
パネルは以下の手順でデザインしました。
- ケースの仕様書からパネルのサイズや穴の位置、組み立てに必要なマージンなどの情報を取得
- CADソフトでパネルを設計する。今回は無料のInkscapeを利用しました
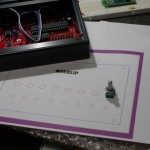
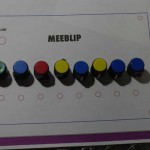
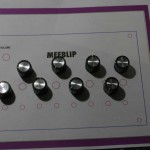
- プリンタで実寸大で印刷して、状態の確認。
- 再度CADソフトで修正(2へ戻る)
- 納得の行く設計ができた時点で発注
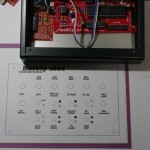
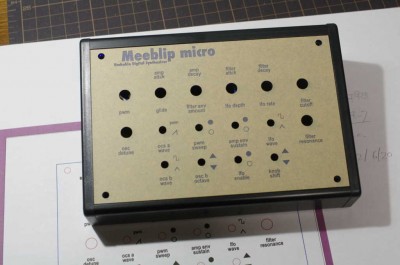
最初はボリューム8個を横に並べる設計としましたが、実際に印刷して確かめてみると、ノブの間隔が近すぎて操作しにくいことが分かりました。このため、横に並べる数を6個に減らして、代わりに縦を3段にしました。文字と記号を入れましたが、スペースの都合でアルファベット文字の横幅の少ない文字を選びました。
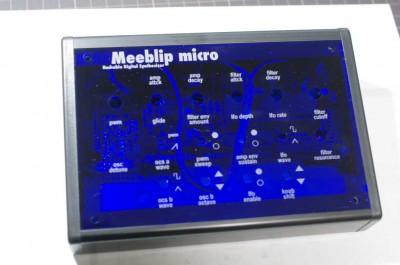
加工素材としてアクリルの押し出し材を注文しました。Emergeplusの山田さんから、これだと文字が綺麗にでないとのアドバイスをもらい、キャスト材に変更しました。板厚は3mmのコバルトブルーを選択しました。黒のケースとマッチしていると思います。
4. 組み立て
アクリルが届いたところで、パーツの組み付けと、TAKACHIケースの加工を行いました。
現物に合わせてみたところ、スイッチの穴が小さかったので、テーパリーマで少しだけ拡げました。その他は大きさ、位置ともに良い感じです。
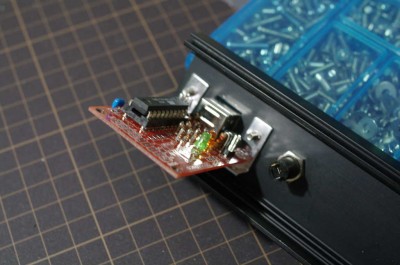
次に、TAKACHIのケースを加工します。1.5mm厚のアルミアングルですが、この加工が一番たいへんでした。
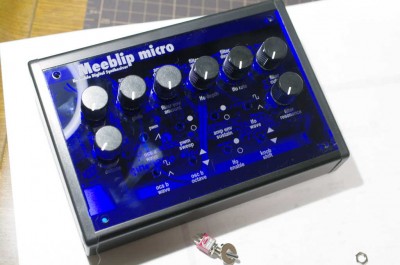
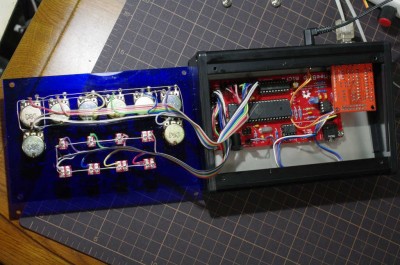
あとは一気に配線すれば完成です。スズメッキ線でボリュームスイッチ間をつなぎ、基板との配線はフラットケーブルを使いました。基本はデジタルシンセなので、配線もすっきりしています。
5. 使う
USB-MIDI端子をパソコンにつなぐだけで、直ぐに利用できます。パソコンの代わりに、iPadからも利用可能です。
iPad用のアプリでTouchOSCではシンセのパラメータを制御することができます。お勧めです。
(了)
1. What is MeeBlip?
MeeBlip is a digital synthesizer designed with AVR microcontroller. For more information, please take a look at the following homepages.
- MeeBlip Project(meeblip.com)
- MeeBlip Community
- Source Code Repository
All of the information are distributed on github. As MeeBlip is OSHW (Open Source Hardware), we can modify it to fit our needs.
Reflex Audio Systems distributes Meebip as various kinds of kit with reasonable price. With the kits, it will be no hassle to collect parts on the BOM.
I obtained a Meeblip Micro kit, which includes PCB and the parts on PCB. It took about two weeks to reach hear in Japan from Canada.
2. Modify MeeBlip micro kit
There are a few kinds of MeeBlip kits available on the web page. All kits includes the same CPU with synthe software but they are slightly different in functions and knobs.
MeeBlip micro is the cheapest kit. It took only $39.99. The kit include PCB and all of the parts on the PCB. As switches, volumes, and case is not includes, I need to collect them in Akihabara. This way, I can make an original syhthe with MeeBlip kit.
The other models of MeeBlip have 8 volues and 16 switches, or even more, to change parameters of syhtne. In the case of micro, all of the parameters can be changed with MIDI. It is possible to create a unit without knobs and switches with micro. The unit should have Power connector, MIDI-IN, and signal-out.
I designed my unit with the following policies.
- As syhtne should have knob and switch on the panel, I decided to add 8 volumes and 8 switches.
- Use USB-MIDI , instead of serial MIDI. I added Moco PCB to do the job.
- Use USB bus power, for the simplicity.
3. Design the Panel
I decided to use ready-made case for the basis. I choose control box style case from TAKACHI’s catalog.
For the panel, I ordered a acryl plate for laser-cut & laser-etch service. I asked Emergeplus as they just do annual sale.
I designed the panel by the following steps.
- Check the dimensions of the panel, position of mount holes, and clearance information from design sheet of the case. Design information is on TAKACHI’s homepage.
- Design the panel with 2D-CAD. I use Inkscape on my iMac
- Print the design file to printer .The size setting must be x1. Place parts on the paper to check clearance.
- If problems are found go to step 2
- After enough iterations, just order it
In the first stage of the design I place 8 volume horizontally. With printed panel and knobs, I found the space between knobs is not enough, and very hard to operate in the design. I changed my design to place 6 volume horizontally. I place 3 columns instead of two in the previous design. I used condensed fonts for the labels of the knobs and switched, to save spaces on the panel.
I choose 3mm acryl, cobalt blue, for the panel. The color match black TAKACHI case.
4. Assemble it
I received the panel in 3 days after I e-mail the CAD data. I processed the bottom case and assembled the panel.
The hole for volume is just fine but those for switches are a little bit small. I picked up a taper reamer to enlarge the holes. The rest of the parts was just fine fit.
The next step is to make holes on original case by TAKACHI. I need to handle 1.5mm al. angle with my hand drill, which was the hardest part.
After assemble the volume and switch on the case, I soldered wire between these parts and PCB. I used tin-wire to connect between volumes and switches, and flat cable between panel and PCB.
5. Use it
As this unit has USB-MIDI built-in, I can connect it to PC via USB. iPad can also be used as MIDI-HOST.
To use MeeBlip with iPad, I recommend TouchOSC, as it can send CC to Meeblip to change parameters.
(fin)
Awesome! 😀